Having a Lovesac bean bag is all fun and games till you need to move it from one place to another. The best way to move a LoveSac is to shrink it. There is a special kit available out there that lets you do so. Want to ditch the kit and opt for an alternative or any other option?
Well, there is a way to do so. This guide on how to shrink a Lovesac without the kit is all you need to pack your bean bag and transport it. Let’s get going.
- How to Shrink a Lovesac Bean Bag Without a Kit?
- Tools and Materials Required
- Required Time
- Process to Follow
- Step 1. Put the Lovesac in the Plastic Bag
- Step 2. Shrink the Lovesac Using a Vacuum
- Step 3. Wrap the Plastic
- Step 4. Compress the Bean Bag with Your Body
- Step 5. Flip the Lovesac
- Step 6. See for Tears and Holes in the Plastic Bag
- Step 7. Keep Shrinking Till the Bean Bag is Crisp and Solid
- Step 8. Put the Shrunken Lovesac into the Duffle Bag
- Step 9. Remove the Vacuum Hose
- How Does the Lovesac Shrinking Process Work?
- Alternative Method to Shrink Lovesac – DIY Bean Bag Compression Kit
- Another Method
- Top 3 Lovesac Shrink Kit Alternatives – Huge Bags to Store Giant Lovesac Bean Bags
- YiKitHom Extra-Large Duffle Bag
- Betterline Heavy-Duty Extra-Large Storage Bag
- Vacuum Bags for Lovesac
- Coolbebe Sports Duffle Bag
- Lovesac Shrink Kit Duffle Bag Alternatives
- Shrunken Lovesac is Ready to Move!
- FAQs – Frequently Asked Questions
How to Shrink a Lovesac Bean Bag Without a Kit?
You will need the help of another person to shrink the Lovesac without using a kit, just like at the time of assembling it. This process is about shrinking a 6-foot Supersac so you can learn how to shrink any Lovesac product you have. But before shrinking it, you may clean the cover of your Lovesac.
Tools and Materials Required
Before moving on to the actual method of compressing the bean bag without the Lovesac shrinking kit, let’s see what you will need and how the process really works. So that you would know what you are truly doing.
- Vacuum with an attached crevice tool or hose
- Big plastic bags or king/queen size mattress bag
- Duffle bag (Its alternatives are travel bag or any other big fabric bag)
- Duct tape
Required Time
In general, the process to shrink a bean bag doesn’t take a lot of time. The process can take up to 10-20 minutes depending on how strong the suction of your vacuum is.
Process to Follow
Follow these steps in the right order you will be able to shrink your Lovesac at home like an expert:
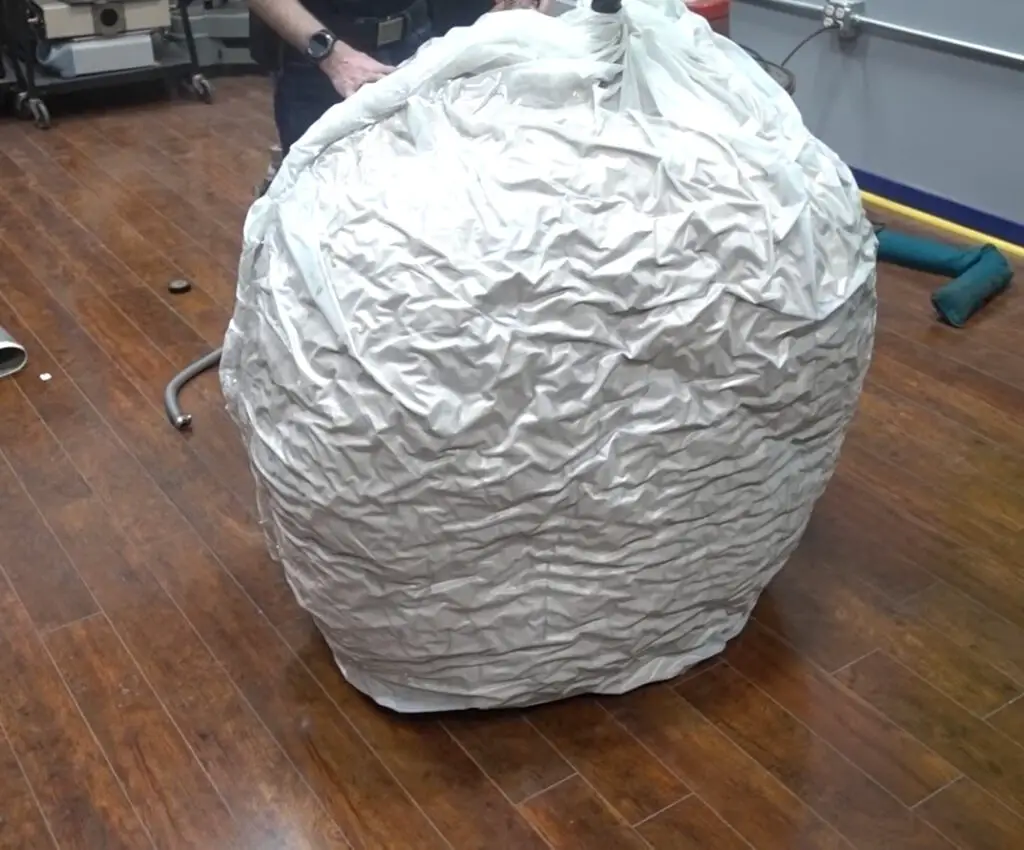
Step 1. Put the Lovesac in the Plastic Bag
The first thing you need to do is place the Lovesac in the plastic bag. The plastic bag should be bigger than the size of the Lovesac. Plus, it should be strong enough to hold the bean bag in it.
Step 2. Shrink the Lovesac Using a Vacuum
Next up, you will need a shop vac or any good vacuum cleaner like Dyson V10 having a hose or crevice tool attached to it. The goal is to suck the air from the fillings through the bean bag cover into the vacuum and compress the air in the Lovesac.
Start the vacuum and shove the hose into the middle of the bean bag. Note that you have to open the plastic and shove the hose into the bean bag cover.
Step 3. Wrap the Plastic
Tightly wrap the plastic bag around the hose. Be careful when wrapping the plastic; do not let the plastic be sucked into the hose or there can be consequences such as the vacuum can be damaged, etc.
You can start compressing the bean bag from the place where you are comfortable enough to do it.
Step 4. Compress the Bean Bag with Your Body
As the vacuum is sucking the air from the Lovesac, put your body against any side of the bean bag except where the vacuum is operating.
Put some force and pressure on the Lovesac to make sure all the air from inside is removed. It also speeds up the shrinking process. The shape you need to obtain at the end of the shrinking is rectangular or like a taco.
Step 5. Flip the Lovesac
As the bean bag is being compressed, flip the bean bag from one side and continue to compress it. Do not let it get shrunk from one side for a long time. If you will not take care of it, the bean bag will become flat and make it impossible for you to pack it.
You can keep on doing it until the Lovesac is completely shrunk from all sides. And remember, when flipping the bean bag, do not let the plastic get sucked into the vacuum.
Step 6. See for Tears and Holes in the Plastic Bag
Due to the high compression of the hose and your applied force, the plastic may tear in some places. They can easily be tackled using duct tape. Just cut the duct tape to the size of the hole and apply it to the torn places.
Step 7. Keep Shrinking Till the Bean Bag is Crisp and Solid
For this step, you will need a duffle bag. Continue to shrink the Lovesac until it becomes hard and almost rock solid. Move your hand on the shrunk bean bag and you will be able to feel its hardness of it. It means that almost all the air from the Lovesac has been removed and is ready to be inserted into the duffle bag.
Step 8. Put the Shrunken Lovesac into the Duffle Bag
Next up, you have to put the shrunken Lovesac into the duffle bag. Open the duffle bag, Pick up the Lovesac with the help of your partner, put the Lovesac in it, and zip the bag up.
While doing this, do not stop the vacuum or let loose the hose or else air will go back into the fillings. Plus, you have to move the zipper towards the vacuum hose and not from the vacuum hose.
Step 9. Remove the Vacuum Hose
Finally, it’s time to remove the vacuum hose from the cover. Carefully remove the plastic wrapped around the hose and begin to remove the hose. Once the hose is removed, quickly close the zipper. You have to remove the hose quickly or else the bean bag will lose its shape and create a whole lot of new mess.
As soon as you will remove the hose, the Lovesac will again begin to expand. But that’s okay as it will expand inside the duffle.
How Does the Lovesac Shrinking Process Work?
A Lovesac bean bag consists of small beans or fillers that have empty spaces in between them. It makes them cover huge areas and thus increases the bean bag’s volume. So, by removing those spaces or air in between the fillings, you can decrease the volume and hence shrink it.
The key is to compress the bean bag fillings and you will be good to go. But you have to be careful with the shrinking process as the filler material can be ruined if it is compressed with extremely high power.
Alternative Method to Shrink Lovesac – DIY Bean Bag Compression Kit
If you need an alternative to a vacuum seal bag for packing the Lovesac, fret not, you can make one at home. With a simple DIY Lovesac compression kit, you can achieve the same results and shrink your favorite piece of furniture:
- Grab a huge-size travel bag or duffle bag that can easily accommodate your Lovesac.
- Gently remove the outer shell from the bean bag and place the foam-filled interior of your Lovesac in the travel or duffle bag.
- Seal the bag, leaving a small hole or space to insert the hose of your vacuum cleaner.
- Then, compress the Lovesac by inserting the vacuum hose and removing the excess air using the vacuum.
- Once you’ve reached your desired level of compression, use duct tape to securely seal the opening, ensuring your Lovesac sac stays compressed in it and is ready to be transported anywhere.
Make sure to get help from someone as it is not possible to do the process by yourself.
Another Method
You also may use a saran wrap or a cling wrap to shrink the bean bag. Just wrap the cling wrap around the Lovesac, make a hole in it for the vacuum hose, and start sucking the air from it. Once the bean bag is shrunk, you can then apply duct tape to it to maintain its shape.
Just make sure to remove the cover from the Lovesac before starting the process. This method can do wonders for small to medium Lovesacs but for the king sizes, Supersacs, etc., it might not work.
Top 3 Lovesac Shrink Kit Alternatives – Huge Bags to Store Giant Lovesac Bean Bags
When you choose alternatives, you must ensure that items work the same as an original product. So, here are some good alternatives. Try them and you will have a great experience.
YiKitHom Extra-Large Duffle Bag
This duffle bag is constructed with 1680 D oxford high-density fabric. This is why it offers exceptional durability, stiffness, and dependability. So, you can confidently place the shrunk Lovesac inside.
The twin zippers also give protection to your Lovesac while you’re traveling. The best news is that it helps you save a lot of money.
Dimensions of the YiKiHome duffel bag are 42 x 13.5 x 23 inches. As a result, it is around the same size as the Lovesac shrinking kit. Thus, you can transport the Lovesac bean bag with ease.
Betterline Heavy-Duty Extra-Large Storage Bag
There is plenty of room in the Betterline extra-large storage bag. Its measurements are 45 x 22 x 26 inches when you take the volume into account. The duffel bag with the Lovesac shrinking kit has the exact same volume.
This bag is water-resistant and tear-resistant due to the polypropylene woven fabric used in its manufacturing. Plus, you should not be concerned about the bag’s durability as this enormous bag can support 100 lbs. or 45 kg weight. Additionally, it is simple to dry and clean. Therefore, you won’t have any problems using it for a long time.
The ideal reason to purchase this sturdy bag is that it is less expensive than the original Lovesac shrinking kit. So, just buy a giant heavy-duty bag and make the process easy.
Vacuum Bags for Lovesac
The Lovesac must be placed in a plastic bag, and the capacity of the bag should be adequate. The sacs made by Lovesac come in various varieties. So, you should choose the ideal vacuum storage bag based on the volume of the Lovesac.
Giant plastic bags are present in abundance in the marketplace. As a result, choosing one of them is simple. However, if the following facts are present when choosing them, it will ensure you make the right choice.
- Air vacuuming valve
- Vacuum seal opening
Coolbebe Sports Duffle Bag
The Coolbebe sports duffel bag is designed specifically for outdoor activities including camping, hunting, sports, and more. Its dimensions are 47 x 15 x 17 inches and has enough space to support your shrunk Lovesac. Therefore, this bag is perfect for your needs.
The COOLBEBE duffle bag comes with a lot of helpful features. Its upgraded zipper allows you to close it. Additionally, the bag has a padded shoulder strap and the bag is made of 600 denier water-resistant fabric. It will be useful to transport them easily from one place to another. As a result, this incredible duffle bag offers 100% protection for your Lovesac bag.
Lovesac Shrink Kit Duffle Bag Alternatives
A duffle bag is included in the Lovesac Shrink Kit. Don’t worry if you don’t have a duffel bag; you can sew one at home. Alternatively, you can approach a tailor to make it for you.
Make sure the fabric you choose for the duffle bag has the strength to hold onto the heavy items. As far as the dimensions of the bag are concerned, you can measure your bean bag to get accurate figures.
To get a duffle bag that is a similar size to your bean bag, you can always visit Lovesac’s website to see whether they include the shrink kit duffle bag’s dimensions.
You may use the original Duffle bag in which your Lovesac was shipped. But it is impossible to shrink the bean bag to the shape in which it was originally delivered by the company.
The big plastic bag is mainly a garbage bag. So, finding big plastic bags is not an issue, You can easily buy them from any online marketplace like Amazon or Walmart.
Shrunken Lovesac is Ready to Move!
It is almost impossible to transport a Lovesac without shrinking it. To do so, you either need a Lovesac shrink kit or its alternative. Their shrinking capability makes these Sacs worth spending money on them.
If you don’t want to spend money on the kit or are unable to find it, you can go for the methods of shrinking Lovesacs that I have discussed in this guide. Good luck with your shifting chores!
FAQs – Frequently Asked Questions
Is it Possible to Shrink your Lovesac?
Yes, it is possible to shrink your Lovesac. Follow the method given in this guide to learn the process.
How to Shrink Your Sac?
To shrink your Sac, vacuum the khaki cover, wrap the plastic around the vacuum hose, and suck the air from the bean bag to shrink it. If the Loveac khaki cover is damaged or can’t be used due to any reason, you may get a new one or pick an alternative option.
How to Store a LoveSac?
You can shrink the LoveSac to store it with ease in any part of your home or apartment.


![How to Set Up CordaRoy’s Bean Bag? [Easy Method]](https://www.probeanbag.com/wp-content/uploads/2023/09/how-to-setup-cordaroys-bean-bag-450x252.png)
![How to Break in a Bean Bag Chair at Home? [Easy Methods]](https://www.probeanbag.com/wp-content/uploads/2023/07/how-to-break-in-bean-bag-chair-450x252.png)