![How to Repair a Vinyl Bean Bag Chair at Home? [3 Easy Ways]](https://www.probeanbag.com/wp-content/uploads/2022/09/how_to_repair_vinyl_bean_bag_chair-450x250.jpg)
A vinyl bean bag chair is one of the best seating options homeowners can opt for. But the problem is it usually gets torn up and holes appear on its surface. The holes on a vinyl bean bag look really bad and ruin its appearance. You should fix them ASAP or else they will not only affect the interior of your room but your vinyl bean bag might also be completely ruined.
Now, the question arises of how you can repair your vinyl bean bag chair. Don’t worry, we will teach you the easy methods to fix this issue. Follow the repairing methods that we have discussed and you will be able to give your vinyl bean bag a new life.
How to Repair Vinyl Bean Bag Chair at Home?
Step 1. Find the hole or puncture on the vinyl bean bag chair.
Step 2. Highlight the tear on the chair.
Step 3. Shake the bean bag to settle the fillings.
Step 4. Find and cut a vinyl patch bigger than the size of the hole
Step 5. Stick the patch on the hole and apply high pressure on it.
Step 6. Use a heat transfer tool to further strengthen the attached vinyl patch.
Best Methods to Repair a Vinyl Bean Bag Chair Like a Pro
Here, we will explain some of the best ways that you can try to repair vinyl bean bag chair. The same methods can be used to repair a leather bean bag chair.
Small to minor scratches on a bean bag can be repaired using tear-aid tape or a similar solution. For more complex issues, other extensive and effective methods are available.

Method 1. Using Vinyl Patch
The process is very easy and anyone can perform it at home.
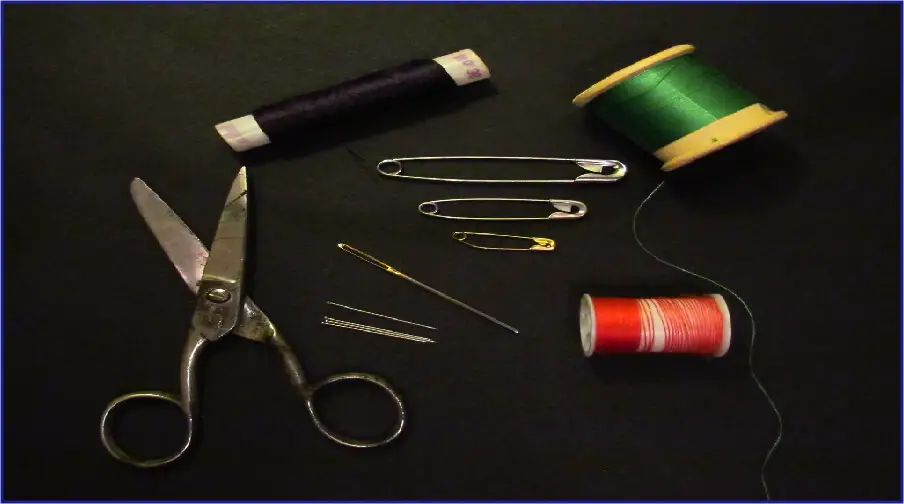
Tools and Materials Required
- Vinyl patch or adhesive patch
- Any heating machine
Follow the following steps to repair your vinyl bean bag chair in no time
Step 1. Find the Hole
The first step is to find the hole or the place from where the vinyl bean bag chair has a tear. To make it prominent, you can mark it with chalk or color pencil.
Step 2. Shake the Bean Bag
Next, shake your bean bag so that its fillings can move away from the hole. It will prevent the beads from falling here and there on the floor.
Step 3. Refill the Bean Bag
If you feel there aren’t enough fillings in the bean bag, refill it. The process to refill a bean bag is very simple and takes almost no time to be completed. In case the fillings are enough, you can move ahead to the next step.
Step 4. Cut the Vinyl Patch
Vinyl patches are easily available in your nearby stores. Get a vinyl patch that matches with the color of your bean bag. Cut it at least twice the size of the hole. If you want to save yourself from the hassle of cutting the adhesive patch, find one of the required size.
Step 5. Fix Vinyl Patch on the Hole or Tear
Post that, peel off the protective layer of plastic and expose the sticky surface of the vinyl patch. Place the sticky side of the patch on the marked hole or tear and apply a good amount of pressure on it. Ensure there are no air bubbles in there or the patch will not stick properly.
Step 6. Heat it
Use any heat machine such as a blow dryer or iron to heat the patch. Heating the newly attached patch with a heat transfer tool will make sure it is stick to the bean bag’s surface perfectly and remove any air bubbles from there.
Wait for two to three hours before using the bean bag as in this time, the glue with be dried up.
Pro Tip
If you don’t want to expose the repaired area and alter the looks of your vinyl bean bag, you should attach the vinyl patch from the inside of your bean bag cover. Open the zipper lock, remove the beans, turn the bean bag inside out and then repair it.
There you go, you have successfully repaired your vinyl bean bag chair.
Method 2. Using a Durable Scrap Piece of Vinyl
This method involves using reliable vinyl scrap pieces or fabric and some other tools which are mentioned ahead to fix the vinyl bean bag chair.

Required Tools and Materials
- Scrap piece of vinyl
- Glue or reliable adhesive
- Heat transfer machine
The steps for this method are:
Step 1. Locate the Hole or Puncture
As mentioned in the previous method, the first thing you need to do is to locate the tear or puncture on the bean bag. You can mark it using a temporary marker or chalk.
Step 2. Move the Fillings Away
This step is also the same as the previous step. Simply give a jerk to the bean bag so that the beans can move somewhere else from the damaged area.
Step 3. Pick a Piece of Vinyl Scrap
Search for a piece of vinyl scrap of color similar to your vinyl bean bag.
Step 3. Cut the Vinyl Scrap Piece
Now, measure the size of the hole or puncture and cut the vinyl scrap piece of at least more than ¼ inches of the hole’s size.
Step 4. Apply Adhesive
Post that, it’s time to apply adhesive to the surfaces. Clean the surface of the bean bag’s damaged area and vinyl fabric before applying the adhesive. After cleaning, put the glue on the piece of vinyl and the bean bag’s surface. Use a spatula, toothpick, spoon, or knife to apply the glue.
Step 5. Join the Piece of Vinyl Scrap
After applying the adhesive, join both surfaces together. Apply a great deal of pressure to make sure they stick together the right way.
Step 6. Use Heat Transfer Tool
Use a heat transfer tool to apply heat to the repaired surface. Heat will make sure the piece of vinyl scrap is stick to the surface in the best way possible.
Step 7. Hammer the Surface
In the end, use a hammer to stroke the repaired surface. The stroke should not be very hard or else it will ruin the fixed surface. Wait for five to six hours so that the glue dries up. Once the drying time of the glue is over, you can use your vinyl bean bag.
Method 3. Using Vinyl Repair Kit
This method uses a bean bag repair patch kit or vinyl repairing kit to fix the damaged vinyl bean bag chair. You can easily find one from any nearby automotive store.
Tools and Materials Required
- Vinyl repair kit
- Damp cloth
- Rubbing alcohol
- Spatula
- Small grain paper
- Heat transfer machine
Step 1. Get Your Hands on Vinyl Repair Kit
Go to the nearest automotive store and get your hands on a vinyl repair kit. Find a kit of the color to that of your bean bag chair.
Step 2. Look for the Puncture or Cut
Look around the bean bag and search for the cut or tear. Once found, make a circle around it using marker or chalk to make it prominent for repairing purposes.
Step 3. Clean the Damaged Area
Use a moist cloth to clean the bean bag’s damaged region. If it’s too grimy, wipe the dirt or grease off with some rubbing alcohol and a cloth.
Step 4. Putting the Bean Bag Filling
Fill the bean bag if required. You can follow the standard procedure to refill your bean bag. If the beads have not spilled out of the puncture, you don’t need to follow this step.
Step 5. Cut the Adhesive Vinyl Patch
After that, cut a piece of the adhesive patch included in the vinyl repair kit to the appropriate size of the tear. Make sure that the piece is at a minimum of 1/4 inch more than the hole’s diameter.
Step 6. Attach the Patch
Take the patch’s non-sticky side and push it inside the puncture with the help of a spatula or toothpick. Remember that you must cover the complete puncture with the patch.
Step 7. Apply the Adhesive Mixture
Combine the tint and repair solution in the mixing container that comes with the vinyl repair kit.
Make sure the mouth of the puncture is evenly covered with the repair mixture using a spatula, toothpick, or any other tool.
Step 8. Heat Transfer Method
Use grain paper and place it on the adhesive patch with its rough side facing downwards. Then, you need to apply heat to the patch to make it stick properly. For this purpose, use a heat press machine or iron. Give it some time to settle down and then remove the grain paper.
That’s how you can repair your vinyl bean bag chair using the repair kit. You can use the same method to repair small holes, tears, or punctures on your vinyl bean bag at home.
FAQs – Frequently Asked Questions
How Do You Repair a Vinyl Bean Bag?
There are various methods to repair a vinyl bean bag chair. Find the hole, highlight it, and cut a vinyl scrap piece bigger than that of the hole’s size. Then, apply some glue to the hole and vinyl patch. Attach the patch on the tear and apply pressure. There you go, that is how you can fix your vinyl bean bag.
How Do You Seal a Torn Bean Bag?
To seal a torn bean bag, get a vinyl patch, cut it equal to the size of the hole, apply adhesive on them, and stick them together. Then, apply heat to them to perfectly stick them together.
How Do You Restore a Bean Bag?
Shake the bean bag to restore it. Put the stuffing back into the bean bag if you previously took it out and placed it in a trash bag. If not, just give the bean bag a 2 to 5-minute shake. The beans’ air pockets will be refilled by this action, enabling them to take on their former shape.
How Do You Stick a Bean Bag?
To stick a bean bag, open the bean bag zipper, put cardboard in it, and start pouring the bean bag filling into it. Carefully pour the filler so that it doesn’t spill out. Once filled, close the bean bag zipper lock and give it a shake.
How to Fix a Big Joe Bag Chair?
To fix a Big Joe bean bag chair, use a paper clip or wire, insert it inside the zipper lock and move it up and down. By moving the child safety zipper lock upwards and downwards, you will be able to open the cover of your Big Joe bean bag.
No More Holes or Tears on Your Vinyl Bean Bag Chair!
Holes, tears, or punctures on a vinyl bean bag chair look extremely odd and awful. To repair your vinyl bean bag, you can follow any of the methods given in this guide.
All of the methods are simple and can be performed by anyone. After following these methods, you will be able to make your torn-down piece of furniture into a new one.


![How to Set Up CordaRoy’s Bean Bag? [Easy Method]](https://www.probeanbag.com/wp-content/uploads/2023/09/how-to-setup-cordaroys-bean-bag-450x252.png)
![How to Break in a Bean Bag Chair at Home? [Easy Methods]](https://www.probeanbag.com/wp-content/uploads/2023/07/how-to-break-in-bean-bag-chair-450x252.png)


